IFK-Kit Injection Floor Repair
Wood Flooring Repair Kit
Special features
- Fills voids under engineered or solid wood flooring

Wood Flooring Repair Kit
Special features
| Product Description |
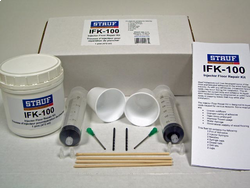
| Stauf Adhesives LLC has developed some of the most sophisticated adhesives in the timber flooring industry. As with any adhesives, occasional hollow spots may occur during the installation. This kit contains the correct tools and adhesive to repair ANY hardwood timber (engineered or solid) hollow spots or popping noises that may arise after installation. The Injector Floor Repair Kit is designed to repair voids caused for various reasons. Some examples are: - Uneven subfloors - Improper curing of adhesive - Open times prolonged - Improper Trowel usage - Water damage - Dimensional stability of timber flooring |
| Pre-Installation Checklist |
| A successful installation requires proper preparation of the sub floor. Read and understand all applicable guidelines and technical data sheets before beginning installation. Follow industry standards and flooring manufacturer's recommendations for sub floor moisture content, design, layout and application of flooring materials. All slab constructions must meet the specific requirements of the floor covering to be installed. |
| Installation Procedure |
| Locate all hollow / popping spots in the floor prior to installation as this will save time and make the process easier. Once all locations have been marked, pre drill all holes in boards to accept syringe with drill bits provided. TIP: Drill holes using 3M blue painters tape by placing tape over area to be drilled. This will help keep finish from chipping when drill is used. Drill holes at 45° angle to assist in hiding repair. TIP: It is also desirable to drill holes in spring timber as these are more easily disguised after repair is complete. If multiple holes are drilled, mark with tape or post it note to speed locating the repair. After holes have been drilled, load syringe with adhesive. It is best to pour adhesive into the plastic cup, then load syringe without needle in place as this will load adhesive faster into syringe. Once adhesive has been drawn into syringe, screw needle onto syringe. Do not apply too tightly as this comes on and off easily and should require little pressure. Finger tight should suffice. Fill void with adhesive from syringe until there is contact between boards and substrate. Remove syringe, place cap over needle, and use dowel rod to plug hole. This may require tapering and hand sanding dowel rod to assure proper fit. In most cases dowel rod can be inserted and broken off. Make sure no dowel is protruding from hole. Once the hole has been plugged with dowel, fill the hole with a common pigmented timber filler. The repair can then be buffed with a soft cloth to totally disguise repair. |
| Limitations |
| In case of accident, injury, spill or exposure, see MSDS sheet for information. Consult technical data sheet at www.staufusa.com for updated information. |
| The foregoing representations are based on the results of our most current product and material testing within a controlled environment and are of a non-obligatory advisory nature only. As such, they do not constitute an express or implied warranty of any kind including the Warranty of Merchantability and/or Fitness for a Particular Purpose. Because we have no control over the actual quality of workmanship, materials used and worksite conditions, STAUF USA Adhesive LLC, will in no event be liable for any incidental and/or consequential damages. Therefore, we strongly recommend that prior on-site testing be conducted to refer to and study the suitability of the product for the intended purpose. With the release of this technical information sheet all its prior versions become invalid. For warranty and warranty disclaimer information please see our Limited Lifetime Warranty @ www.staufusa.com |
|
|
||||||||||||||||||||
| Revision: 2015-10-06 12:40:27 | |||||||||||||||||||||